Google Apps Script(GAS)からPostgreSQLに接続する方法を徹底解説!Cloud Run Functionsの活用法も紹介
目次
はじめに
前回、Google Apps Script(GAS)とGoogleスプレッドシートを活用し、Meta広告のマーケティングAPIから広告データを集計する方法をご紹介しました。
記事を公開して数日後、友人から「早速試してみた」との連絡がありました。彼の会社でもMeta広告を利用しており、手軽にデータを集計できる方法に出会えて業務が大幅に効率化されたと喜んでいました。実際に活用してもらい、役に立ったという声をいただけるのは嬉しいものです。その後、友人から新たな相談がありました。
「Google Apps Script(GAS)で集計したデータを、PostgreSQLに保存・更新する方法を知りたい」
聞けば、彼の会社の基幹システムはPostgreSQLを利用しているとのこと。広告データをGoogleスプレッドシートに集計するだけでなく、そのままPostgreSQLへ自動で反映できれば、さらに業務の効率が向上するそうです。そこで今回は、GASを使ってPostgreSQLにデータを挿入・更新する方法について解説します。「GASからPostgreSQLに接続できず困っている」という方にも役立つ内容となっていますので、ぜひ最後までご覧ください。
Google Apps Script(GAS)でPostgreSQLに直接接続できない?
Google Apps Script(GAS)を使ってPostgreSQLにデータを挿入・更新したいと考える方は多いかもしれません。しかし、GASにはPostgreSQLと直接接続する機能がありません。公式ドキュメントによると、GASはJDBCサービスを通じて外部データベースと接続できますが、サポートされているのは以下のデータベースのみです。
- Google Cloud SQL for MySQL
- MySQL
- Microsoft SQL Server
- Oracle Database
つまり、PostgreSQLはサポート対象外となっており、GAS単体での直接接続は難しいのが現状です。そこで今回は、外部サービスを活用してGASとPostgreSQLをつなぐ方法を紹介します。
外部サービスの選定基準
Google Apps Script(GAS)とPostgreSQLを連携するための外部サービスを選ぶにあたり、以下の2つのポイントを重視しました。
大手のサービスであること
→ 信頼性が高く、長期的に利用できる可能性が高い。
公式ドキュメントやブログが充実していること
→ 問題が発生しても、解決策を見つけやすい。
この基準を満たすのが、Amazon Web Services(AWS)、Microsoft Azure(Azure)、Google Cloud(GCP)の3大クラウドサービスです。これらのクラウドが提供するサービスを活用することで、効率的にGASとPostgreSQLを連携できます。また、3大クラウドサービスを利用する場合、以下の3つのサービスが選択肢として考えられます。
| クラウド | サービス | 特徴 |
|---|---|---|
| Amazon Web Services(AWS) | AWS Lambda | 幅広いサービスと連携可能 |
| Microsoft Azure(Azure) | Azure Functions | Microsoft製品との親和性が高い |
| Google Cloud(GCP) | Cloud Run Functions | Googleサービスとの統合が容易 |
どのクラウドを選ぶかは、現在使っているサービスや環境との相性を考慮するとよいでしょう。これらのサービスは、サーバーの管理不要でスクリプトを実行できる「サーバーレス環境」です。Google Apps Script(GAS)単体でできない処理も、これらのクラウドサービスを活用すれば実現可能になります。
サーバーレス環境が最適な理由
今回、GASからPostgreSQLにデータを送る方法を考える上で、サーバーレス環境が最適な理由は以下の3つです。
① インフラ管理不要で手軽に使える
通常のサーバーを使う場合、環境構築やセキュリティ管理が必要になりますが、サーバーレス環境ではコードをアップロードするだけで、すぐに実行できるため、非常に手軽です。
② スケーラブルで負荷対策が不要
サーバーレス環境は、アクセスが増えても自動的に処理を分散し、負荷に応じて適切なリソースを確保してくれます。例えば、夜間に大量のデータを処理する場合でも、自動でスケールアップするため、パフォーマンスを気にする必要がありません。
③ コストを抑えられる
通常のサーバーは、常時稼働しているため、使っていない時間でも費用が発生します。一方、サーバーレス環境は、必要なときだけ動作する「従量課金制」のため、無駄なコストを抑えることができます。
Google Cloud(GCP)のCloud Run Functionsを選ぶ理由
今回、Google Apps Script(GAS)とGoogleスプレッドシートを使用しているため、同じGoogleのサービスであるGoogle Cloud(GCP)のCloud Run Functionsを利用するのが最適です。理由は下記の通りです。
- Googleサービスとの高い親和性
GASやGoogleスプレッドシートとの連携が容易で、作業がスムーズに進みます。 - アカウント管理が簡単
既存のGoogleアカウントをそのまま利用できるため、追加のアカウント作成や管理が不要です。 - 手軽な導入と拡張性
環境構築の手間がなく、必要に応じてスケーリングも自動で行われます。
実装編
今回は3つのステップで実装します。具体的には以下の内容です:
- GoogleスプレッドシートとGoogle App Scriptを使ってAPIを使い、情報を取得します。
- 取得したデータをGoogleスプレッドシートに格納できるように設定します。
- 最後に、Cloud Run Functionsを使えるように設定します。
まず、Google App Scriptのコードについてですが、前回のMeta広告の情報取得コードも良いかもしれませんが、今回は初めてこの記事を読んでいる方のために、あえて新しい内容に挑戦します。具体的には、東京証券取引所など世界の証券取引所に上場している企業の株価を取得するコードを書きます。コード内には詳細なコメントも記載していますので、ぜひ参考にしてください。
GoogleスプレッドシートとGoogle App Scriptを使って株価データを取得する
まず、GoogleスプレッドシートとGoogle App Scriptを使って証券取引所に上場している企業の株価情報を取得する方法を紹介します。今回は、株価データを取得するAPIとして「Yahoo Finance API」を使います。Yahoo Finance APIは無料で利用できる株価データAPIを提供しており、取得したい銘柄コードを指定することで、株価情報を取得できます。コードのサンプルを以下に示します。これをGoogle App Scriptに入力することで、スプレッドシートに株価データを取得できます。
function fetchToyotaStockData() {
  // Yahoo FinanceのAPI URL
 // トヨタ自動車(7203.T)の株価情報を取得するURL
  const url = 'https://query2.finance.yahoo.com/v8/finance/chart/7203.T?range=1y&interval=1d&events=split%7Cdiv';


  // 以下は他の企業や指数の株価情報を取得するURLの例です。必要に応じてコメントを外して使用してください。
  // ----------------------------------------------------------------
  // エヌビディア(NVDA)の株価情報を取得するURL
  // const url = 'https://query2.finance.yahoo.com/v8/finance/chart/NVDA?range=1y&interval=1d&events=split%7Cdiv';

  // ソニー(6758.T)の株価情報を取得するURL
  // const url = 'https://query2.finance.yahoo.com/v8/finance/chart/6758.T?range=1y&interval=1d&events=split%7Cdiv';

  // 三菱UFJ(8306.T)の株価情報を取得するURL
  // const url = 'https://query2.finance.yahoo.com/v8/finance/chart/8306.T?range=1y&interval=1d&events=split%7Cdiv';

  // S&P500指数(^GSPC)の株価情報を取得するURL
  // const url = 'https://query2.finance.yahoo.com/v8/finance/chart/^GSPC?range=1y&interval=1d&events=split%7Cdiv';
  // ----------------------------------------------------------------

  // APIからデータを取得
  try {
    // APIからデータを取得
    const response = UrlFetchApp.fetch(url, { muteHttpExceptions: true });
    const statusCode = response.getResponseCode();

    if (statusCode !== 200) {
      throw new Error(`APIリクエスト失敗: ステータスコード ${statusCode}`);
    }

    const data = JSON.parse(response.getContentText());

    if (!data.chart || !data.chart.result || data.chart.result.length === 0) {
      throw new Error('APIレスポンスに必要なデータが含まれていません');
    }

    // シートを取得、存在しない場合は作成
    let sheet = SpreadsheetApp.getActiveSpreadsheet().getSheetByName('トヨタ_株価');
    if (!sheet) {
      sheet = SpreadsheetApp.getActiveSpreadsheet().insertSheet('トヨタ_株価');
    } else {
      sheet.clear(); // 既存のデータをクリア
    }

    // ヘッダーを設定
    sheet.appendRow([
      'Date',            // 株価データが記録された日付
      'Close Price',     // その日の取引終了時点での株価(終値)
      'Open Price',      // その日の取引開始時点での株価(始値)
      'High Price',      // その日の取引時間中での最高株価(最高値)
      'Low Price',       // その日の取引時間中での最安株価(最安値)
      'Volume',          // その日の取引量(取引された株式の総数)
      'Currency',        // 株価が表示される通貨単位(例:USD, JPY)
      'Symbol',          // 企業のティッカーシンボル(株式の識別コード)
      'Exchange',        // 取引所の名前(株が取引される場所)
      '52Week High',     // 過去52週間での最も高い株価
      '52Week Low',      // 過去52週間での最も低い株価
      'Regular Market Price',  // 通常取引時間内の株価(通常の市場での価格)
      'Dividend Amount'  // その株が支払う配当金の額(通常1株当たりの金額)
    ]);

    // データの取り出し
    const timestamps = data.chart.result[0].timestamp;
    const closes = data.chart.result[0].indicators.quote[0].close;
    const opens = data.chart.result[0].indicators.quote[0].open;
    const highs = data.chart.result[0].indicators.quote[0].high;
    const lows = data.chart.result[0].indicators.quote[0].low;
    const volumes = data.chart.result[0].indicators.quote[0].volume;
    const dividends = data.chart.events ? data.chart.events.dividends : {};  // dividendsが存在するか確認

    // 株式情報(通貨、シンボル、取引所、52週最高値・最低値、今日の株価)
    const meta = data.chart.result[0].meta;
    const currency = meta.currency;  // 通貨
    const symbol = meta.symbol;  // シンボル
    const exchange = meta.fullExchangeName;  // 取引所
    const fiftyTwoWeekHigh = meta.fiftyTwoWeekHigh;  // 52週最高値
    const fiftyTwoWeekLow = meta.fiftyTwoWeekLow;  // 52週最低値
    const regularMarketPrice = meta.regularMarketPrice;  // 今日の株価

    // 日付、株価、株式情報、配当金などをスプレッドシートに書き込む
    for (let i = 0; i < timestamps.length; i++) {
      const date = new Date(timestamps[i] * 1000); // Unixタイムスタンプを日付に変換
      const closePrice = closes[i];
      const openPrice = opens[i];
      const highPrice = highs[i];
      const lowPrice = lows[i];
      const volume = volumes[i];

      // 配当金情報(存在する場合)
      const dividend = dividends[timestamps[i]] ? dividends[timestamps[i]].amount : null;

      // 各行をスプレッドシートに追加
      sheet.appendRow([
        date, closePrice, openPrice, highPrice, lowPrice, volume,
        currency, symbol, exchange, fiftyTwoWeekHigh, fiftyTwoWeekLow,
        regularMarketPrice, dividend
      ]);
    }

    Logger.log('株価データ取得完了!');
  } catch (error) {
    Logger.log(`エラー発生: ${error.message}`);
  }
}
このコードを実行した後は、この株価の記録があるURLを確認して、以下のスクリーンショットにあるIDをコピーしてください

Googleスプレッドシートにアクセス設定を行う
次に、Googleスプレッドシートのアクセス設定を行います。Google App Scriptでは、スプレッドシートの操作に必要な権限をスクリプトに付与する必要があります。スクリプトを初めて実行する際に、Googleからアクセス許可を求められるので、指示に従って許可を与えてください。
これで、スクリプトを実行する際に必要な権限が与えられ、Googleスプレッドシートにデータを書き込むことができるようになります。
1.まずはGoogle Cloud Platform(GCP)にアクセスしてください
2.以下の画面からプロジェクトを作成してください
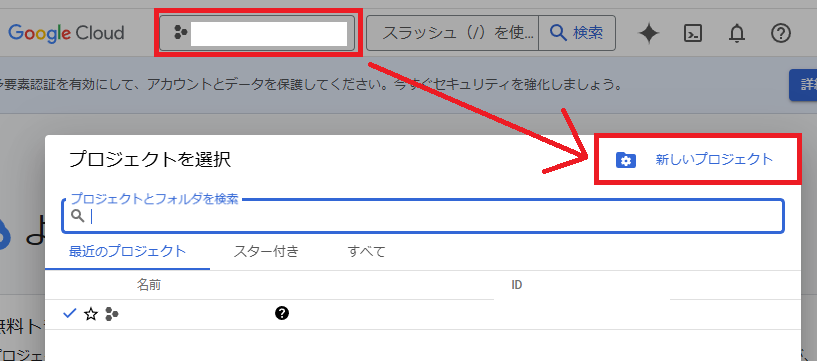
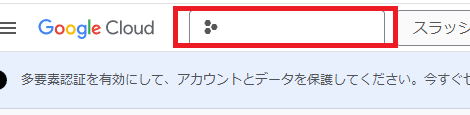
3.作成が終わったら今回使用するプロジェクトを選択してください
4.Google Cloud コンソールで、Google スプレッドシート API を有効にします。
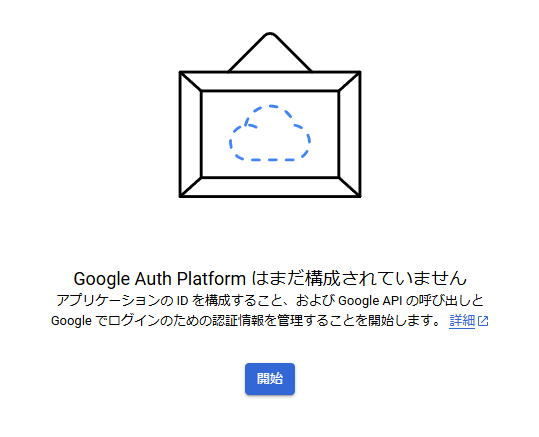
4.Google Cloud コンソールで、ブランディングに移動してください。
5.「開始」をクリックしてください
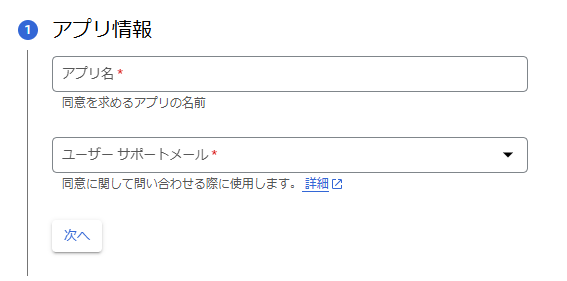
6.下記に情報を書いてください。完了したら「次へ」をクリックしてください
7.「外部」を選択してください

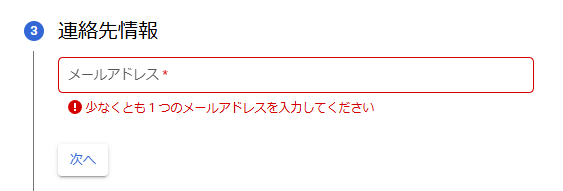
8.メールアドレスを入力してください
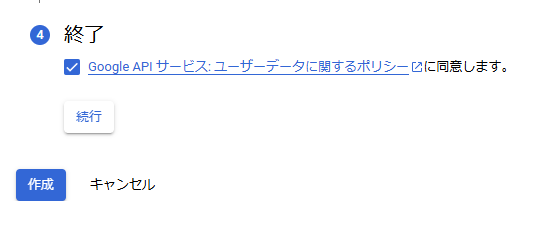
9.チェックマークを押して、「作成」ボタンを押下してください
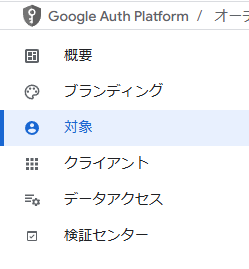
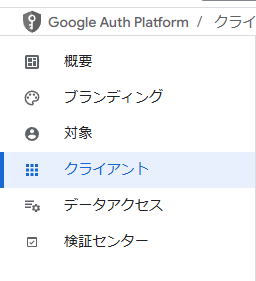
10.左メニューにある「対象」をクリックしてください
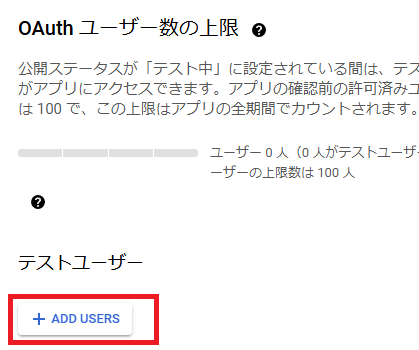
11.「ADD USERS」をクリックして、メールアドレスを入力して、ユーザーを追加してください
12.左メニューにある「クライアント」をクリックしてください
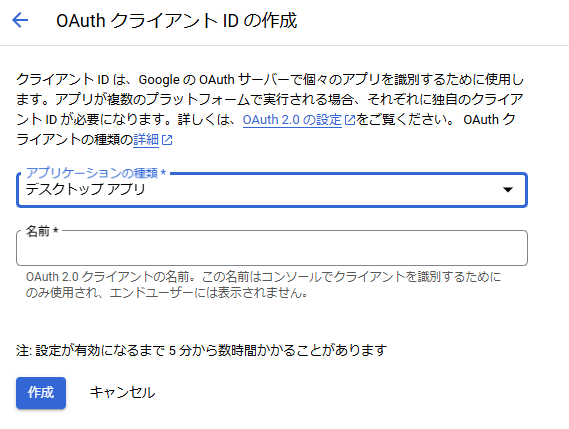
13.「クライアントを作成」をクリックしてください

14.アプリケーションの種類を「デスクトップアプリ」を選択して「作成をクリックしてください」
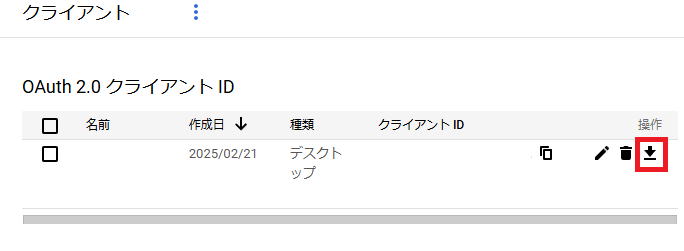
15.ダウンロードのアイコンをクリックしてください
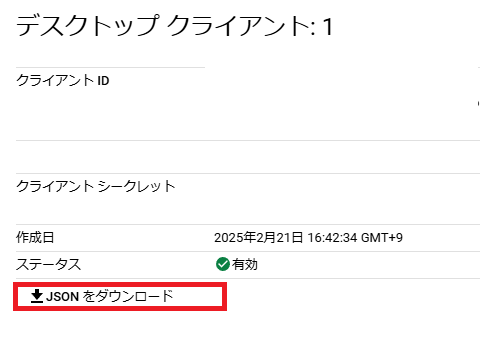
16.「JSONをダウンロード」をクリックして、JSONファイルをダウンロードしてください
これで準備が完了しました。
Cloud Run Functionsの設定
Cloud Run Functionsを使用してこの処理を自動化します。Cloud RunはGoogle Cloudのサーバーレスサービスで、コンテナ化されたコードを実行できます。今回は、Google Apps Script(GAS)と似た書き方ができるNode.jsを使用します。JavaScriptをベースにしているため、Node.jsを選びました。
1.ディレクトリを作成と移動を行います。そして、さきほどダウンロードしたJSONファイルをgas-cloud-run傘下に追加して、ファイル名をcredentials.jsonに変更してください。
# 「gas-cloud-run」ディレクトリを作成
mkdir gas-cloud-run

# 作成したディレクトリに移動
cd gas-cloud-run2.公式ドキュメント通りにpackage.jsonに以下の内容を書きます。
{
  "name": "nodejs-docs-samples-functions-hello-world-get",
  "version": "0.0.1",
  "private": true,
  "license": "Apache-2.0",
  "author": "Google Inc.",
  "repository": {
    "type": "git",
    "url": "https://github.com/GoogleCloudPlatform/nodejs-docs-samples.git"
  },
  "engines": {
    "node": ">=16.0.0"
  },
  "scripts": {
    "test": "c8 mocha -p -j 2 test/*.test.js --timeout=6000 --exit"
  },
  "dependencies": {
    "@google-cloud/functions-framework": "^3.1.0"
  },
  "devDependencies": {
    "c8": "^10.0.0",
    "gaxios": "^6.0.0",
    "mocha": "^10.0.0",
    "wait-port": "^1.0.4"
  }
}
3.npm を使用してライブラリをインストールします。
npm install googleapis@105 @google-cloud/local-auth@2.1.0 --save4.PostgreSQLに以下のSQLを実行して、テーブルを作成してください
CREATE TABLE public.tbl_stock_data (
    id SERIAL PRIMARY KEY,  -- 自動インクリメントのID
    stock_date TIMESTAMP,  -- 日付
    close_price DECIMAL(10, 2),  -- 終値
    open_price DECIMAL(10, 2),  -- 始値
    high_price DECIMAL(10, 2),  -- 高値
    low_price DECIMAL(10, 2),  -- 安値
    volume BIGINT,  -- 取引量
    currency VARCHAR(10),  -- 通貨
    symbol VARCHAR(10),  -- シンボル
    exchange VARCHAR(100),  -- 取引所
    fifty_two_week_high DECIMAL(10, 2),  -- 52週最高値
    fifty_two_week_low DECIMAL(10, 2),  -- 52週最低値
    regular_market_price DECIMAL(10, 2),  -- 本日株価
    dividend_amount DECIMAL(10, 2)  -- 配当金
);
5.次に公式ドキュメント通りにindex.jsファイルを作成して、以下のコードを書いてください
const fs = require('fs').promises;
const path = require('path');
const process = require('process');
const { authenticate } = require('@google-cloud/local-auth');
const { google } = require('googleapis');
const { Client } = require('pg');

const safeParseFloat = (value) => {
  const num = parseFloat(value);
  return isNaN(num) ? null : num;
};

const safeParseInt = (value) => {
  const num = parseInt(value);
  return isNaN(num) ? null : num;
};


// If modifying these scopes, delete token.json.
const SCOPES = ['https://www.googleapis.com/auth/spreadsheets.readonly'];
// The file token.json stores the user's access and refresh tokens, and is
// created automatically when the authorization flow completes for the first
// time.
const TOKEN_PATH = path.join(process.cwd(), 'token.json');
const CREDENTIALS_PATH = path.join(process.cwd(), 'credentials.json');

/**
 * Reads previously authorized credentials from the save file.
 *
 * @return {Promise<OAuth2Client|null>}
 */
async function loadSavedCredentialsIfExist() {
  try {
    const content = await fs.readFile(TOKEN_PATH);
    const credentials = JSON.parse(content);
    return google.auth.fromJSON(credentials);
  } catch (err) {
    return null;
  }
}

/**
 * Serializes credentials to a file compatible with GoogleAuth.fromJSON.
 *
 * @param {OAuth2Client} client
 * @return {Promise<void>}
 */
async function saveCredentials(client) {
  const content = await fs.readFile(CREDENTIALS_PATH);
  const keys = JSON.parse(content);
  const key = keys.installed || keys.web;
  const payload = JSON.stringify({
    type: 'authorized_user',
    client_id: key.client_id,
    client_secret: key.client_secret,
    refresh_token: client.credentials.refresh_token,
  });
  await fs.writeFile(TOKEN_PATH, payload);
}

/**
 * Load or request or authorization to call APIs.
 *
 */
async function authorize() {
  let client = await loadSavedCredentialsIfExist();
  if (client) {
    return client;
  }
  client = await authenticate({
    scopes: SCOPES,
    keyfilePath: CREDENTIALS_PATH,
  });
  if (client.credentials) {
    await saveCredentials(client);
  }
  return client;
}

/**
 * Prints the names and majors of students in a sample spreadsheet:
 * @see https://docs.google.com/spreadsheets/d/1BxiMVs0XRA5nFMdKvBdBZjgmUUqptlbs74OgvE2upms/edit
 * @param {google.auth.OAuth2} auth The authenticated Google OAuth client.
 */
async function listMajors(auth) {
  const sheets = google.sheets({ version: 'v4', auth });
  let client;

  try {
    // Google Sheetsからデータ取得
    const res = await sheets.spreadsheets.values.get({
      spreadsheetId: '[[Googleスプレッドシートにアクセス設定を行うで取得したシートのID]]',  // シートのIDを指定
      range: 'トヨタ_株価!A2:M',  // 取得する範囲を指定
    });
    const rows = res.data.values;

    if (!rows || rows.length === 0) {
      console.log('No data found.');
      return;
    }

    // PostgreSQL接続設定
    client = new Client({
      user: 'your_username',
      host: 'localhost',
      database: 'your_database',
      password: 'your_password',
      port: port_number,
    });

    await client.connect();
    await client.query('BEGIN'); // トランザクション開始

    // データ処理
    for (const row of rows) {
      try {
        const stock_date = new Date(row[0]);
        const close_price = safeParseFloat(row[1]);
        const open_price = safeParseFloat(row[2]);
        const high_price = safeParseFloat(row[3]);
        const low_price = safeParseFloat(row[4]);
        const volume = safeParseInt(row[5]);
        const currency = row[6] || null;
        const symbol = row[7] || null;
        const exchange = row[8] || null;
        const fifty_two_week_high = safeParseFloat(row[9]);
        const fifty_two_week_low = safeParseFloat(row[10]);
        const regular_market_price = safeParseFloat(row[11]);
        const dividend_amount = safeParseFloat(row[12]);

        // 既存データのチェック
        const checkQuery = 'SELECT COUNT(*) FROM tbl_stock_data WHERE stock_date = $1';
        const checkRes = await client.query(checkQuery, [stock_date]);
        const rowCount = parseInt(checkRes.rows[0].count);

        if (rowCount > 0) {
          // UPDATE処理
          const updateQuery = `
            UPDATE tbl_stock_data
            SET
              close_price = $1,
              open_price = $2,
              high_price = $3,
              low_price = $4,
              volume = $5,
              currency = $6,
              symbol = $7,
              exchange = $8,
              fifty_two_week_high = $9,
              fifty_two_week_low = $10,
              regular_market_price = $11,
              dividend_amount = $12
            WHERE stock_date = $13
          `;
          await client.query(updateQuery, [
            close_price, open_price, high_price, low_price, volume,
            currency, symbol, exchange, fifty_two_week_high, fifty_two_week_low,
            regular_market_price, dividend_amount, stock_date
          ]);
          console.log(`Updated record for ${stock_date}`);
        } else {
          // INSERT処理
          const insertQuery = `
            INSERT INTO tbl_stock_data (
          stock_date, close_price, open_price, high_price, low_price, volume,
          currency, symbol, exchange, fifty_two_week_high, fifty_two_week_low,
          regular_market_price, dividend_amount
        ) VALUES ($1, $2, $3, $4, $5, $6, $7, $8, $9, $10, $11, $12, $13)
      `;
          await client.query(insertQuery, [
            stock_date, close_price, open_price, high_price, low_price, volume,
            currency, symbol, exchange, fifty_two_week_high, fifty_two_week_low,
            regular_market_price, dividend_amount
          ]);
          console.log(`Inserted new record for ${stock_date}`);
        }
      } catch (rowError) {
        console.error('Error processing row:', row, rowError);
      }
    }

    await client.query('COMMIT'); // トランザクションコミット
  } catch (err) {
    console.error('An error occurred:', err);

    // トランザクションロールバック
    if (client) {
      await client.query('ROLLBACK');
    }
  } finally {
    // PostgreSQL接続を閉じる
    if (client) {
      await client.end();
      console.log('Database connection closed.');
    }
  }
}

authorize().then(listMajors).catch(console.error);
6.以下のコマンドで実行してください。その際、以下のようなメッセージが出るので、それぞれ「続行」をクリックしてください
node index.js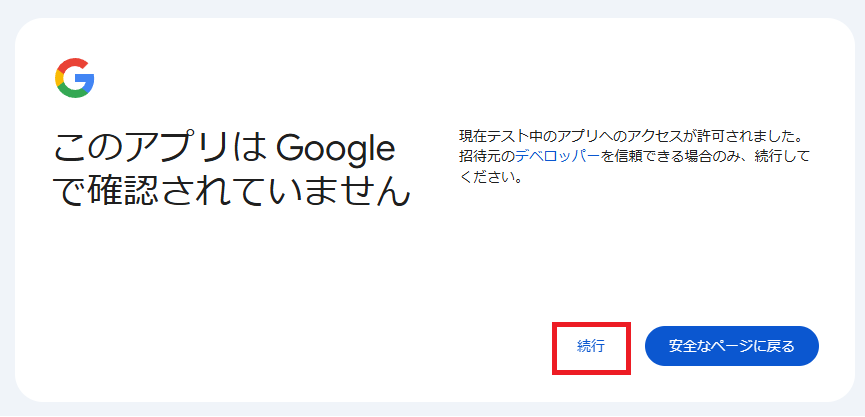
このコードが成功したらtbl_stock_dataにレコードが入っているので確認してみてください。そして、gas-cloud-run傘下にtoken.jsonが生成されたと思うのでご確認ください。
7.次はCloud Run Functionsに関数をデプロイしましょう。こちらのリンクからArtifact Registry、Cloud Build、Cloud Run Admin API、Cloud Logging API を有効にします。
8.こちらのリンクからGoogle Cloud CLIをインストールしてください
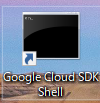
9.gcloud CLIのインストールが完了すると、デスクトップにアイコンが表示されます。アイコンをクリックすると、gcloud CLIのコマンドラインが開き、操作を開始できます。
10.このコマンドでgcloud CLI を初期化します。
gcloud init成功したら
Pick configuration to use:
[1] Re-initialize this configuration [default] with new settings
[2] Create a new configuration
と出るので、1を選んでください。
11.使用したいアカウントを選択します。
Select an account:
 [1] *****@******.com
 [2] Sign in with a new Google Account
 [3] Skip this step
12.プロジェクトの一覧が出ます。選択したいプロジェクトを選択してください。
[1] ****************
[2] Enter a project ID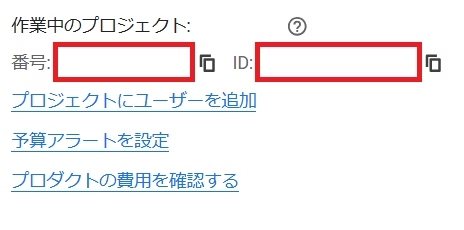
[3] Create a new project13.このリンクから、使用するプロジェクトを選択してください。次に、プロジェクトの「番号」と「ID」をコピーします。その後、コマンドを実行して、Cloud Run Functionのデフォルトプロジェクトを設定します。
gcloud config set project [[今回使用するID]]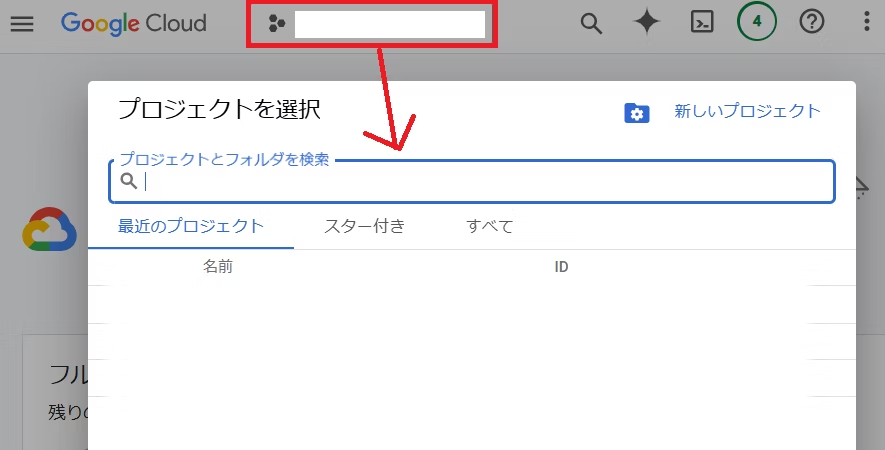
14.Cloud Buildがソースを構築できるようにするためには、次のコマンドを実行して、Compute Engineのデフォルトサービスアカウントに「Cloud Buildサービスアカウント」のロールを付与する必要があります
gcloud projects add-iam-policy-binding [[13.で取得したID]] ^
    --member=serviceAccount:[[13.で取得した番号]] ^-compute@developer.gserviceaccount.com ^
    --role=roles/cloudbuild.builds.builder
15.5で書いたコードを以下のように書き換えてください。具体的には
const functions = require('@google-cloud/functions-framework');を追加してください。そして
authorize().then(listMajors).catch(console.error);の箇所を以下のように変更します。
functions.http('helloGET', (req, res) => {
  authorize().then(listMajors).catch(console.error);
  res.send('データ追加完了!');
});
完成コードは下記の通りです。
const fs = require('fs').promises;
const path = require('path');
const process = require('process');
const { authenticate } = require('@google-cloud/local-auth');
const { google } = require('googleapis');
const { Client } = require('pg');
const functions = require('@google-cloud/functions-framework');
const safeParseFloat = (value) => {
const num = parseFloat(value);
return isNaN(num) ? null : num;
};
const safeParseInt = (value) => {
const num = parseInt(value);
return isNaN(num) ? null : num;
};
// If modifying these scopes, delete token.json.
const SCOPES = ['https://www.googleapis.com/auth/spreadsheets.readonly'];
// The file token.json stores the user's access and refresh tokens, and is
// created automatically when the authorization flow completes for the first
// time.
const TOKEN_PATH = path.join(process.cwd(), 'token.json');
const CREDENTIALS_PATH = path.join(process.cwd(), 'credentials.json');
/**
* Reads previously authorized credentials from the save file.
*
* @return {Promise<OAuth2Client|null>}
*/
async function loadSavedCredentialsIfExist() {
try {
const content = await fs.readFile(TOKEN_PATH);
const credentials = JSON.parse(content);
return google.auth.fromJSON(credentials);
} catch (err) {
return null;
}
}
/**
* Serializes credentials to a file compatible with GoogleAuth.fromJSON.
*
* @param {OAuth2Client} client
* @return {Promise<void>}
*/
async function saveCredentials(client) {
const content = await fs.readFile(CREDENTIALS_PATH);
const keys = JSON.parse(content);
const key = keys.installed || keys.web;
const payload = JSON.stringify({
type: 'authorized_user',
client_id: key.client_id,
client_secret: key.client_secret,
refresh_token: client.credentials.refresh_token,
});
await fs.writeFile(TOKEN_PATH, payload);
}
/**
* Load or request or authorization to call APIs.
*
*/
async function authorize() {
let client = await loadSavedCredentialsIfExist();
if (client) {
return client;
}
client = await authenticate({
scopes: SCOPES,
keyfilePath: CREDENTIALS_PATH,
});
if (client.credentials) {
await saveCredentials(client);
}
return client;
}
/**
* Prints the names and majors of students in a sample spreadsheet:
* @see https://docs.google.com/spreadsheets/d/1BxiMVs0XRA5nFMdKvBdBZjgmUUqptlbs74OgvE2upms/edit
* @param {google.auth.OAuth2} auth The authenticated Google OAuth client.
*/
async function listMajors(auth) {
const sheets = google.sheets({ version: 'v4', auth });
let client;
try {
// Google Sheetsからデータ取得
const res = await sheets.spreadsheets.values.get({
spreadsheetId: '[[Googleスプレッドシートにアクセス設定を行うで取得したシートのID]]', // シートのIDを指定
range: 'トヨタ_株価!A2:M', // 取得する範囲を指定
});
const rows = res.data.values;
if (!rows || rows.length === 0) {
console.log('No data found.');
return;
}
// PostgreSQL接続設定
client = new Client({
user: 'your_username',
host: 'localhost',
database: 'your_database',
password: 'your_password',
port: port_number,
});
await client.connect();
await client.query('BEGIN'); // トランザクション開始
// データ処理
for (const row of rows) {
try {
const stock_date = new Date(row[0]);
const close_price = safeParseFloat(row[1]);
const open_price = safeParseFloat(row[2]);
const high_price = safeParseFloat(row[3]);
const low_price = safeParseFloat(row[4]);
const volume = safeParseInt(row[5]);
const currency = row[6] || null;
const symbol = row[7] || null;
const exchange = row[8] || null;
const fifty_two_week_high = safeParseFloat(row[9]);
const fifty_two_week_low = safeParseFloat(row[10]);
const regular_market_price = safeParseFloat(row[11]);
const dividend_amount = safeParseFloat(row[12]);
// 既存データのチェック
const checkQuery = 'SELECT COUNT(*) FROM tbl_stock_data WHERE stock_date = $1';
const checkRes = await client.query(checkQuery, [stock_date]);
const rowCount = parseInt(checkRes.rows[0].count);
if (rowCount > 0) {
// UPDATE処理
const updateQuery = `
UPDATE tbl_stock_data
SET
close_price = $1,
open_price = $2,
high_price = $3,
low_price = $4,
volume = $5,
currency = $6,
symbol = $7,
exchange = $8,
fifty_two_week_high = $9,
fifty_two_week_low = $10,
regular_market_price = $11,
dividend_amount = $12
WHERE stock_date = $13
`;
await client.query(updateQuery, [
close_price, open_price, high_price, low_price, volume,
currency, symbol, exchange, fifty_two_week_high, fifty_two_week_low,
regular_market_price, dividend_amount, stock_date
]);
console.log(`Updated record for ${stock_date}`);
} else {
// INSERT処理
const insertQuery = `
INSERT INTO tbl_stock_data (
stock_date, close_price, open_price, high_price, low_price, volume,
currency, symbol, exchange, fifty_two_week_high, fifty_two_week_low,
regular_market_price, dividend_amount
) VALUES ($1, $2, $3, $4, $5, $6, $7, $8, $9, $10, $11, $12, $13)
`;
await client.query(insertQuery, [
stock_date, close_price, open_price, high_price, low_price, volume,
currency, symbol, exchange, fifty_two_week_high, fifty_two_week_low,
regular_market_price, dividend_amount
]);
console.log(`Inserted new record for ${stock_date}`);
}
} catch (rowError) {
console.error('Error processing row:', row, rowError);
}
}
await client.query('COMMIT'); // トランザクションコミット
} catch (err) {
console.error('An error occurred:', err);
// トランザクションロールバック
if (client) {
await client.query('ROLLBACK');
}
} finally {
// PostgreSQL接続を閉じる
if (client) {
await client.end();
console.log('Database connection closed.');
}
}
}
//authorize().then(listMajors).catch(console.error);
functions.http('uploadStockDataToPostgreSQL', (req, res) => {
authorize().then(listMajors).catch(console.error);
res.send('データ追加完了!');
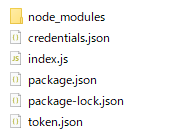
});現状ファイル構成は下記の通りになっています。
16.gcloud CLIに関数をデプロイするために、以下のコマンドを実行してください。asia-northeast2 はリージョン名です。使用できるリージョンはこのリンクをご参考ください。
gcloud beta run deploy addstockdatatopostgres  ^
      --source . ^
      --function uploadStockDataToPostgreSQL ^
      --base-image nodejs20 ^
      --region asia-northeast2 ^
      --allow-unauthenticated
このコマンドが成功したら以下のメッセージが表示されます。Google Chromeなどのブラウザで動作するか確認してみてください。
Service URL: https://*****************.***********.run.appGoogle App Scriptにコードを統合しよう。
ここまで進めば、あと少しです!「Google App Scriptを使って株価データを取得する」で作成したコードに、先ほど発行したURLを実行するコードを追加してください。実際にこのコードが成功したらtbl_stock_dataにレコードが入っているので確認してみてください。
function fetchToyotaStockData() {
  // Yahoo FinanceのAPI URL
  // トヨタ自動車(7203.T)の株価情報を取得するURL
  const url = 'https://query2.finance.yahoo.com/v8/finance/chart/7203.T?range=1y&interval=1d&events=split%7Cdiv';


  // 以下は他の企業や指数の株価情報を取得するURLの例です。必要に応じてコメントを外して使用してください。
  // ----------------------------------------------------------------
  // エヌビディア(NVDA)の株価情報を取得するURL
  // const url = 'https://query2.finance.yahoo.com/v8/finance/chart/NVDA?range=1y&interval=1d&events=split%7Cdiv';

  // ソニー(6758.T)の株価情報を取得するURL
  // const url = 'https://query2.finance.yahoo.com/v8/finance/chart/6758.T?range=1y&interval=1d&events=split%7Cdiv';

  // 三菱UFJ(8306.T)の株価情報を取得するURL
  // const url = 'https://query2.finance.yahoo.com/v8/finance/chart/8306.T?range=1y&interval=1d&events=split%7Cdiv';

  // S&P500指数(^GSPC)の株価情報を取得するURL
  // const url = 'https://query2.finance.yahoo.com/v8/finance/chart/^GSPC?range=1y&interval=1d&events=split%7Cdiv';
  // ----------------------------------------------------------------

  // APIからデータを取得
  try {
    // APIからデータを取得
    const response = UrlFetchApp.fetch(url, { muteHttpExceptions: true });
    const statusCode = response.getResponseCode();

    if (statusCode !== 200) {
      throw new Error(`APIリクエスト失敗: ステータスコード ${statusCode}`);
    }

    const data = JSON.parse(response.getContentText());

    if (!data.chart || !data.chart.result || data.chart.result.length === 0) {
      throw new Error('APIレスポンスに必要なデータが含まれていません');
    }

    // シートを取得、存在しない場合は作成
    let sheet = SpreadsheetApp.getActiveSpreadsheet().getSheetByName('トヨタ_株価');
    if (!sheet) {
      sheet = SpreadsheetApp.getActiveSpreadsheet().insertSheet('トヨタ_株価');
    } else {
      sheet.clear(); // 既存のデータをクリア
    }

    // ヘッダーを設定
    sheet.appendRow([
      'Date',            // 株価データが記録された日付
      'Close Price',     // その日の取引終了時点での株価(終値)
      'Open Price',      // その日の取引開始時点での株価(始値)
      'High Price',      // その日の取引時間中での最高株価(最高値)
      'Low Price',       // その日の取引時間中での最安株価(最安値)
      'Volume',          // その日の取引量(取引された株式の総数)
      'Currency',        // 株価が表示される通貨単位(例:USD, JPY)
      'Symbol',          // 企業のティッカーシンボル(株式の識別コード)
      'Exchange',        // 取引所の名前(株が取引される場所)
      '52Week High',     // 過去52週間での最も高い株価
      '52Week Low',      // 過去52週間での最も低い株価
      'Regular Market Price',  // 通常取引時間内の株価(通常の市場での価格)
      'Dividend Amount'  // その株が支払う配当金の額(通常1株当たりの金額)
    ]);

    // データの取り出し
    const timestamps = data.chart.result[0].timestamp;
    const closes = data.chart.result[0].indicators.quote[0].close;
    const opens = data.chart.result[0].indicators.quote[0].open;
    const highs = data.chart.result[0].indicators.quote[0].high;
    const lows = data.chart.result[0].indicators.quote[0].low;
    const volumes = data.chart.result[0].indicators.quote[0].volume;
    const dividends = data.chart.events ? data.chart.events.dividends : {};  // dividendsが存在するか確認

    // 株式情報(通貨、シンボル、取引所、52週最高値・最低値、今日の株価)
    const meta = data.chart.result[0].meta;
    const currency = meta.currency;  // 通貨
    const symbol = meta.symbol;  // シンボル
    const exchange = meta.fullExchangeName;  // 取引所
    const fiftyTwoWeekHigh = meta.fiftyTwoWeekHigh;  // 52週最高値
    const fiftyTwoWeekLow = meta.fiftyTwoWeekLow;  // 52週最低値
    const regularMarketPrice = meta.regularMarketPrice;  // 今日の株価

    // 日付、株価、株式情報、配当金などをスプレッドシートに書き込む
    for (let i = 0; i < timestamps.length; i++) {
      const date = new Date(timestamps[i] * 1000); // Unixタイムスタンプを日付に変換
      const closePrice = closes[i];
      const openPrice = opens[i];
      const highPrice = highs[i];
      const lowPrice = lows[i];
      const volume = volumes[i];

      // 配当金情報(存在する場合)
      const dividend = dividends[timestamps[i]] ? dividends[timestamps[i]].amount : null;

      // 各行をスプレッドシートに追加
      sheet.appendRow([
        date, closePrice, openPrice, highPrice, lowPrice, volume,
        currency, symbol, exchange, fiftyTwoWeekHigh, fiftyTwoWeekLow,
        regularMarketPrice, dividend
      ]);
    }
    Logger.log('株価データ取得完了!');

    // Cloud Run FunctionのURLを実行する処理を追加
    // -----------------------------------------------
    const cloudRunUrl = 'https://*****************.***********.run.app'; // Cloud Run FunctionのURL
    const cloudRunResponse = UrlFetchApp.fetch(cloudRunUrl, { muteHttpExceptions: true });
    Logger.log(`Cloud Run Function 実行結果: ${cloudRunResponse.getContentText()}`);
    // -----------------------------------------------

  } catch (error) {
    Logger.log(`エラー発生: ${error.message}`);
  }
}
まとめ
いかがでしたでしょうか?Google Apps Script(GAS)を使ってPostgreSQLにデータを挿入・更新する際に、Cloud Run Functionsを活用する方法は一見複雑に思えるかもしれません。しかし、自分でコードを書くことで自由度が高くなり、Node.jsの学習にもなります。Node.jsは非常にメジャーな言語なので、習得しておいて損はありません。
実は、GASとPostgreSQLを連携できるサービスはいくつか存在しますが、個人的には自分でコードを書いて開発するほうが良いと考えています。その理由は、今回紹介した実装に加えて、さらに拡張することが可能だからです。もちろん、これはあくまで一つの考え方なので、自分に合ったツールを選ぶのも良いでしょう。
また、単純にPostgreSQLにデータを追加するだけなら、Cloud Run Functionsのみで問題なく動作すると考える方もいるかもしれません。それは確かに正しいですが、Cloud Run Functionsにはスプレッドシートのようなデータを可視化する仕組みがないため、他の人とデータを共有しづらいという課題があります。そのため、GoogleスプレッドシートとGASを併用することで、より分かりやすく管理できるのではないかと思います。
なお、今回紹介した手順やソースコードは、すべて公式ドキュメントに記載されています。そのため、基本的には公式の手順に従うのが最も確実です。さらに、公式ドキュメントは変更があればすぐに更新されるため、最新の情報を反映しやすいというメリットもあります。
今回の記事が少しでも参考になれば幸いです。
参考文献
- JDBC | Apps Script | Google for Developers
- AWS/Azure/Google Cloudサービス比較 2023.12 #GoogleCloud – Qiita
- サーバーレスって何が便利なの ? AWS でサーバーレスを構築するためのサービスをグラレコで解説 – builders.flash☆ – 変化を求めるデベロッパーを応援するウェブマガジン | AWS
- IT 運用から開放された人々の “サーバーレス” ライフに迫る ~ サーバーレスによって運用がどれぐらいラクになるか知ろう ! ~ – builders.flash☆ – 変化を求めるデベロッパーを応援するウェブマガジン | AWS
- OAuth 同意画面を設定し、スコープを選択する | Google Workspace | Google for Developers
- Google Apps ScriptでYahoo Finance APIから株価を取得してアレコレしたい! #GoogleAppsScript – Qiita
- クイックスタート: gcloud CLI を使用して関数を Cloud Run にデプロイする | Cloud Run Documentation | Google Cloud
- Node.js のクイックスタート | Google Sheets | Google for Developers
TEXT BY
TIGER RACK
タイガーラック編集部


このカテゴリの最新記事
2025.05.16
2024.01.17
2024.08.22
2023.09.04